You have successfully advanced to dip pen calligraphy. You’re ready to use a dip pen to create beautiful hand lettering using the most masterful and delicate of strokes. The only thing standing in the way of your calligraphy art is your inexperience in using dip pens correctly.
You can kick-start your calligraphy journey using dip pens by following these steps to use them properly:
Step #1: Gather Your Calligraphy Supplies
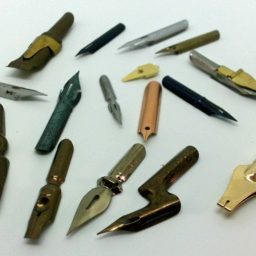
Pointed nibs and chiselled nibs are two types of dip pen nibs you can purchase. If you’re a beginner calligrapher, we recommend going with a pointed nib. Pointed nibs allow beginners to create thin upstrokes and thick downstrokes because they are easier to control.
Next, you need a dip pen holder. You’ll need to put your dip pen into the pen holder. There isn’t a hard and fast rule when it comes to selecting a pen holder, so you can choose the one you like best. For instance, the Brause Ergonomic Penholder provides finger support.
Lastly, you need to get dip pen ink and calligraphy paper. Get ink that’s easy to use, applies flawlessly to various types of calligraphy paper, dries instantly, is weather-resistant, and doesn’t fade over time.
Step #2: Use Pencil to Write Your Calligraphy on Paper
Take a pencil to draw three sets of equally-spaced horizontal lines and one vertical line in the centre. With your pencil, write on the horizontal lines using an existing calligraphy style or your cursive style in a larger version. Write on the first, second, and third lines.
Step #3: Dip the Dip Pen into the Ink
Before you dip the pen into the dip pen ink, we recommend transferring a small amount of ink into another compact container from its original container. This ensures preciseness when dipping the pen into the ink and reduces the risk of the ink spilling. Here’s how to dip the pen:
- Dip your pen into the dip pen ink just above the vent or middle hole in the nib, and then gently tap the nib on the dip pen holder to remove the excess ink from it.
- When holding the dip pen, maintain a 45-degree angle between the pen and the calligraphy paper.
- Exert equal pressure to both tines of the dip pen. Don’t place extra pressure on one side of the pen.
Step #4: Use the Dip Pen to Trace the Pencil
Now, just go over the calligraphy and then erase the pencil lines once the ink has completely dried. If it’s quick-drying dip pen ink, it’ll take only a few minutes. However, for those who want to get straight to drawing with their dip pen, here’s how to do it:
- Apply pressure while making a downstroke.
- Exert less pressure to make a thin line and exert more pressure to make a thicker line.
- Vertical strokes are the easiest to create, so start with them first.
- Once you have mastered the vertical stroke, you can practice creating other shapes with the dip pen such as loops, o’s, and slanted lines.
Step #5: Take Care of Your Dip Pen
You need to wash and dry your dip pen regardless of whether you’re taking a long or short break. Just dip the pen’s nib into the water, swirl it a few times, and use a dry paper towel to wipe it. When you’re cleaning it, remove the pen from the dip pen holder to prevent the ink from dripping and getting into the holder.
You’re all set to use the dip pen to create stunning calligraphy. At Blots Pens, you’ll discover that we have an incredible range of dip pens. As you progress in your calligraphy journey, we’ll be there to help you move forward by providing you with the right tools.